Thursday, October 29, 2009

2009 WQS "People's Choice" Winner


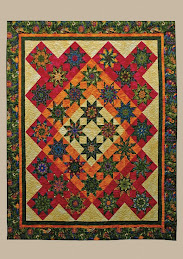
Local quilter Kate Nerrie went away with the "People's Choice" award for favorite quilt at the 2009 Westminster Quilt Show. Check out "Earth Tone Trip Around the World." Congrats, Kate!!! And thanks to everyone who attended the show and voted!

Thursday, September 17, 2009

Six-hour 'Pieced Flowers' Workshop - Oct 17th - $50 (without book), $75 (with)


Hello -

If you are interested in participating in the Pieced Flowers workshop on Saturday, October 17th, you should reserve your seat pronto!!! At this point, there is limited availability.

Here's the link to information about the workshop on the show website:
http://www.westminstercares.org/wqs09/workshops.htm

The venue where the workshop will take place (Westminster Fire Department) is less than a mile from the Westminster Quilt Show location (Westminster Center School). That means that you can spend your lunch hour the day of the workshop enjoying the show.

The workshop hours are 9-noon and 1-4 p.m. The cost is $75 including a copy of Ruth McDowell's beautiful book, Pieced Flowers (retails for $28) or $50 without the book. We now have copies of the book at the Westminster Cares' office so if you live locally and pay your $75 workshop fee, you are welcome to pick up your copy of the book in advance of the quilt show.

For more information or to reserve your seat, please email me.

Nan

Tuesday, September 8, 2009

Announcing 2009 Westminster Quilt Show Vendors

Here they be - the 2009 Westminster Quilt Show vendors:

Quilt-A-Way

Barnyard Quilting

Cowles Quilting Machines


Log Cabin Quilting

Priscilla Kibbee


Quilters Treasure

Sewin’ Love Fabric Shoppe

Click on their names to visit their websites and/or contact them via email.

Friday, August 21, 2009

Introducing Pamela Johnson - 2009 Special Exhibitor & Workshop Co-Leader

Westminster Cares & the 2009 Westminster Quilt Show Planning Committee are thrilled about this year's special exhibitor, Pamela Johnson, a talented student of the quilting technique taught by Ruth B. McDowell. You can learn more about her at Pam's website, and we also have a link to her bio on the Westminster Quilt Show website.

We hope to use this blog between now and the October 17-18 quilt show to introduce you to the artistry and magic of Pamela Johnson. And we want to make sure you know that she and another McDowell student, Norma Abel, will be co-leading a six-hour Pieced Flowers workshop on Saturday, October 17th (the first day of the show in Westminster). Please note that this workshop is limited and only nine seats remain so if interested, email us today at wqs2009@gmail.com. Details about the workshop can be found on the quilt show website.

And NOW (or whenever is convenient), you're in for a treat!

Pam has taken the time to document the process of making a beautiful quilt of hellebores using the technique she and Norma will be teaching at the October 17th workshop. Unfortunately, the blogging software doesn't seem to have a setting where we can change the order of the blogposts here. So, to begin at the beginning of Pam's "Pieced Flowers virtual workshop," please scroll down all the way to the first post in the series and read up.

Enjoy!!!!

Thursday, August 20, 2009

finally...

Another leaf and a more typical hellebore flower - unlike the Eric Smithii, this plant's flowers hang down.

I actually have a couple of things to do behind the scenes - the hanging sleeve and the label.

But otherwise, onto the next design.

and more...

Another view of an Eric Smithii flower

more detail

Detail of Eric Smithii flower showing it fully open and outward facing. Stamens are hand embroidered - lots of French knots in the center.

details

Top left detail showing quilting to indicate structure on the leaf.

Finished!

Border doubles as a binding. I quilted mostly in the background and more lightly, if at all, on the flowers so that they stand a little proud.

Sunday, August 16, 2009

Border


I auditioned dozens of fabrics before making the final choices. As Ruth says, "You make visual choices visually" - just pull out some possibilities and pin them up. Keep doing it until something clicks. It helps to have a huge stash!

Having veered between greens and browns for the border, I decided it needed both, so I added a narrow inner green border and found a fabric for the outer border that had some movement in it as well as several colors, but overall had a reddish brown tint that picked up the red tones in the outer petals and sepals of the flowers, This flash photo isn't very good, but it does indicate that the border is a bit lighter in tone than the background.


Top completed

All three rows sewn and joined together.

I think some coherence as an overall piece is created by carrying specific background fabrics into adjoining squares and by having some elements, like stems cross boundaries. This de-ephasizes the block structure.

The next consideration is a border. In many of my quilts the border is designed in fom the outset and often some elements overlap the border.

Progress - one row completed

I sewed the bottom row of squares together and started on the middle row. Some of the flowers will get more definition from quilting and some will have features, like stamens, added through embroidery.

Sewing at last!

Since the fabric pieces totally obscure the drawing on the design wall, it is hard to figure out where to start sewing. Here's why you need two copies. My reference copy in this cse was the photos overlaid with the piecing diagram.

I started with the bottom row and eased myself into the process by doing the leaf square since this was straight edge piecing and so would go fast. With straight edge piecing, you leave the templates in, match up the tick marks and sew along the edge of the templates - in my case I had used a rotary cutter to add a 1/4" seam allowance so I simply used my 1/4" foot. The templates help keep the piece from distorting where there are many bias edges. I took the templates ut only when I wanted to use them for another leaf.

Next I worked on one of the easier flowers. I had cut out the pieces with an approximate 1/4" seam allowance. First, I needed to draw around the template using a pencil or soft colored pencil that would show against the fabric, and also extend the tick marks out into the seam allowance. Then, I clipped the concave edges to allow the fabric to open up when pinned to a convex piece.

It is necessary to remove the templates before sewing - the reason for drawing in the seam line and why the tick marks have to be extended into the seam allowance. The pieces are pinned using the tick marks to line them up with the concave piece on top.

Fine silk pins work best since you can sew right over them if you don't care to pull them out as you sew. For tight curves, a lot of pins are needed.

Assembling a square

One of the trickier squares shown here sewn. Success hinged on working out and sticking to the piecing order - otherwise there would have been a lot of partial seams or totally inset seams to sew.

Each time a seam is pressed, it is worth paying attention to what is in the foreground and what is in the background - and press towards the foreground. This is obvious, say, in the leaf which points upwards; the seams where the leaf joins to the background were pressed under the leaf, thus it stands a little proud of the background. Similarly, the overlapping petals were pressed towards those on the outside. This helps to give the impression of three-dimensional form.


How long until I sew?


It is very tempting to start sewing, but I've found to my cost in terms of time spent un-picking, that it is much better if all the fabric selections are made before I start sewing. You really want to see how the whole quilt works and be able to make adjustments. I did allow myself to start before picking out the fabrics for the top row leaves as I was confident that using similar fabrics to the bottom row leaf would work.

Here's the design wall with most fabrics chosen and the reference photographs pinned around it.
I tend to let a piece sit while I do other things - in this case I made a baby quilt - looking at it often to see if I'm sure abut the choices. I decided that the colors of the right hand flower in the top row were too dark/ strong, so I replaced a few of the pieces until it pleased me.

Fabric, at last!

After all the drafting, it is such a relief to be able to play with fabric. First I got out all my pinks & creams and arranged them somewhat in value order. Next I gathered a lot of spring greens for the new leaves. Hellebores tend to carry their old leaves through the winter and these are a dull dark blue green. I generally cut them off as the new stems emerge. The new leaves come in yellow/ green hues.

Then I s
tarted to think about background. In this case my photos were not much help because most of the hellebores were pictured against new mulch - very boring. Even though the flowers and leaves are the real focus of these nature-inspired quilts, I find that it makes them much more interesting and natural seeming if multiple fabrics are used in the background, not just one - though I do have one quilt in the show where I made a different decision.

I pulled out boxes of fabrics and tried a lot of different colors with the pinks, creams and spring greens. Eventually, I had maybe a dozen that I felt worked with each other and set off the flowers and leaves.

I started with the square in the middle of the middle row - this flower would be the lightest in the quilt and would set one end of the flower color spectrum. Section by section I cut out the templates, applied them to fabric and pinned them onto the master drawing on the design wall. I started with the flower petals and kept stepping back to see how it looked - and made several adjustments if a fabric didn't work the way I had thought.

All the pieces were "fussy cut" picking the part of a fabric that had the tone and any markings to read as foreground or background petals. I used the original drawings overlaid on the photos as references, usually pinning them up on the wall and I often went back to the computer to get more detail and a better color sense.

The picture was taken after I had pinned up fabrics for the whole of the middle row. The top row shows part of the numbered drawing that I am pinning to. The two leaves are not piecing diagrams - I used a single leaf pattern for all three leaves.This can be seen on the bottom row where the freezer paper templates are pinned shiny side up - hence you can't see the numbers or tick marks.

Creating the templates

Probably most of the freezer paper that is sold is used by quilters for templates. It has the great quality that you can iron it shiny side down on a piece of fabric and it sticks. You can even pull it off and iron it onto another piece of fabric. I just wish they'd make it in wider rolls. The alternative is to butt two pieces together and join them on the dull side with drafting tape.

However, for the Hellebore quilt, I could treat each square as a separate element and so only needed small squares of freezer paper. I taped one of the drawings onto my light box, then taped the freezer paper on top, with the shiny side up. Why the shiny side? Well, this goes onto the wrong side of the fabric and that results in the finished, right side up piece being exactly like the drawing. If you made the templates with the shiny side down on the drawing, you'd end creating a mirror image of the drawing and, believe me, this would be much harder to work on.

Using an ultra-fine black Sharpie, I carefully traced over the lines and the outline of the square.
Then, turned the freezer paper the right side up and put it alongside the drawing. Next, in pencil, I transferred the numbers from the drawing to the dull side of the freezer paper. This is a bit tricky since the dull side is a mirror image, but it works. I also used a highlighter to outline the edges of the square. This helps you to use the straight grain of the fabric for the edge of the square, where possible. In another highlighter color I usually mark the major section lines. Not essential, but it helps when you are putting the jig saw puzzle of fabric together.

This is a picture of the freezer paper template, dull side up, for one of the leaves. I used straight edge piecing for the leaves.

Note the colored tick marks crossing the lines. I used a different color for each side of a given element - look at D1 - green ticks on the boundary with E1, black on the border with C1 and orange on the other side of th triangle.

"Tick marks are your friends!" If you skip this step, you will learn why we say that. They are what tells you which side connects to which other piece - once these elements are cut apart it is amzingly difficult to figure that out if you don't have the tick marks. I pinned this up to just to take the picture - normally, it will be pinned shiny side up on top of the copy of the master drawing on the design wall.


Making copies


Having done all the tracings, I joined the blocks together. In a few cases, I then added some things, like continuing a stem or a leaf across two blocks & adjusted the numbering.

I then took the completed joined-together design to Staples where I had them make a full size black & white copy - 29" wide by 25.5" high.

This diagram gets pinned to the design wall and all the pieces of cut out fabric will be pinned in place - but I get ahead of myself.

Piecing plans

This shows two of the blocks. The colors and the outlines show through. You can see that the drawings are a bit bigger in some dimensions than the photo prints - this was to give the flowers a bit of "breathing space". These two were drawn together, but pieced as separate blocks. What you see are the lines that will represent seam lines. Each element is uniquely numbered within that block.

The first thing I had to do was to work out the major sewing sections. Ignore the bud drawn in on the lower left of the right hand image - that got dropped from the design. Follow the line that cuts through the bud and goes up, bisecting a petal, through the center of the flower and up almost into the top right corner. Eventually, this line would be the final seam line for this block.

This block has sections A through I - not many elements in each, just three in section A. They are numbered in order of sewing and if I have managed it carefully, there will be no partial seams or other awkward things to sew.

For those people who are taking the workshop, I should assure you that Ruth McDowell has done all the work up to this point for you. She has created a drawing of a flower, from that she has made a piecing diagram and she has even numbered all the elements and given a sewing order in the book. But we'll encourage you to look at the piecing diagram we'll provide for you, at the enlarged size, and find the sections and number them for yourself - in this way, you'll learn a lot about how it is done so you will be prepared if you wish to make your own designs.

Simplifying

Having selected, sized and placed the various images, I labeled them so I knew where they would each fit.

Then I used a dark colored pencil and drew on top of the prints the outlines of petals and so on. I ignored everything in the background and sometimes I omitted an extra bud or overlapping flower, paring down to the parts I really wanted to show. In another case, I cut out and moved a bud away from a more open flower so they could be seen as distinct elements.

At this point I made the crucial decision to use curved piecing for the flowers and straight edge piecing for the leaves, all of which would be "new" leaves - mostly to keep the greens in one color family. Curved piecing means it is much easier to create the piecing plan, but much, much more time consuming to sew.

Then I put each print on a light box, overlayed it with tracing paper and using the dark lines as a guide, I created a piecing plan for each.


Trial layout

This is one of the trial layouts - I included an old leaf - the dark one - and some new leaves. The blocks are all the same height, but different widths. This didn't give me quite enough variety, so I kept working on it. I have a design wall - it is a panel covered in flannel to which I can pin prints or fabric.

I left it up there and looked at it from time to time while being busy with other things. Then I'd find some more images, crop, size and print them and shuffle them around some more.

Eventually I settled on 3 rows. Along the way, I used the option to "flip" or create a mirror image in order to have a flower facing left rather than right if that seemed to balance the overall design better.

Saturday, August 15, 2009

Variety of views

This is one of the newer varieties: "Eric Smithii" with very open, flat flowers. I wanted to show the front as well as the sides and back of this plant.


Sizing the blocks

First I cropped a series of images and then resized them to be approximately 8 inches tall. Of course this makes the flower many times larger than in real life, but they need to be bigger to be piecable.

I got to the decision on 8" by doing a few trials, seeing what size some of the individual pieces would need to be and if that looked achievable without a lot of grief. And I also played around with some rough layouts to see if that size would let me showcase a variety of flowers without making an enormous quilt.

Note that this flower is very different from the others, pale pink, lots of veins, drooping and with no dark pink sepals.

Focusing in

In the background of the image you can see some of the old leaves, left over from last year, which are quite dark in color.

I liked seeing the back of this flower which shows the structure and has nice deep shades of pink. So this image went into my "gallery" of possible blocks. It also shows the wonderful rich creams of the petals, though the bud next to it adds a bit of confusion.


Another hellebore

Here's a close up of one of the upward-facing flowers - and also a tight bud which is quite different in color.

I took a lot of digital images and then used Corel's Paint Shop Pro to select some details and re-size them.

Because I liked a lot of different varieties of hellebore, instead of using a single plant on which to base the design, I decided to build the quilt from a series of blocks, each featuring a flower or a leaf.

All the photographs are mine. It is important not to breach copyright by basing a design on someone else's image, unles you have the owner's permission.

Quilts Inspired by Nature - the design process


I'm going to use the Hellebore quilt to illustrate the process I go through. I have a mostly part-shade garden in which these plants - commonly called lenten Rose - seem to be happy. I've added several varieties including some of the newer ones that hold their flowers erect - most varieties have flowers that hang down. Flower colors can vary a lot - cream, light green, pale or deep pink - and leaves change spring green to dark green as the age.

Here's one photographed in April.


Monday, June 1, 2009

2009 Raffle Quilt

Be sure to get your raffle tickets early and often!!!

This year's gorgeous raffle quilt was made by our very own Judith Petry who describes it:

Vibrantly colored Stack ‘n Whack© quilt.
Queen sized (86”X102”).
All cotton top and back, with Quilters Dream Green™ recycled polyester batting.
Designed and pieced by Judith Petry, Westminster, VT
Machine quilted by Quilt-Away.


Raffle tickets can be purchased at the library in Westminster or at the Westminster Cares office (at Westminster Motel). They also are being sold at various community events including Roots on the River, the Gardens of Westminster tour June 20-21, occasional Bellows Falls farmer's markets through the summer, the Saxtons River 4th of July parade & festivities, Old Home Days, and other events through the autumn and of course, at the show itself. Planning also is underway to display the incredible queen-sized quilt in one or more locations in the greater Westminster area.


A picture of the raffle quilt is on the top right side of this blog, and you can read more about it - and how to buy raffle tickets - on the quilt show website.

Saturday, May 16, 2009

Purpose of Blog

Hello -

I have the pleasure of coordinating the planning effort for the 2009 Westminster Quilt Show! The theme this year is A Natural World in Quilts and the big dates are:

October 17-18, 2009

It will take place at the Westminster Center School in Westminster, VT.

My hope is to use this blog to keep interested parties updated on quilt show developments as they happen.

Please know that the planning team is happy to hear any and all comments and suggestions that you have. Please let us know what additional information should be posted on the quilt show website.

Thank you - and we hope to see you at the show!