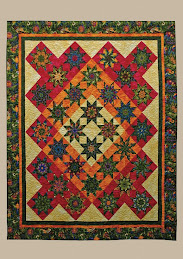
Border doubles as a binding. I quilted mostly in the background and more lightly, if at all, on the flowers so that they stand a little proud.
Showing posts with label art quilt. Show all posts
Showing posts with label art quilt. Show all posts
Thursday, August 20, 2009
Finished!
Border doubles as a binding. I quilted mostly in the background and more lightly, if at all, on the flowers so that they stand a little proud.


Sunday, August 16, 2009
Piecing plans
 This shows two of the blocks. The colors and the outlines show through. You can see that the drawings are a bit bigger in some dimensions than the photo prints - this was to give the flowers a bit of "breathing space". These two were drawn together, but pieced as separate blocks. What you see are the lines that will represent seam lines. Each element is uniquely numbered within that block.
The first thing I had to do was to work out the major sewing sections. Ignore the bud drawn in on the lower left of the right hand image - that got dropped from the design. Follow the line that cuts through the bud and goes up, bisecting a petal, through the center of the flower and up almost into the top right corner. Eventually, this line would be the final seam line for this block.
This block has sections A through I - not many elements in each, just three in section A. They are numbered in order of sewing and if I have managed it carefully, there will be no partial seams or other awkward things to sew.
For those people who are taking the workshop, I should assure you that Ruth McDowell has done all the work up to this point for you. She has created a drawing of a flower, from that she has made a piecing diagram and she has even numbered all the elements and given a sewing order in the book. But we'll encourage you to look at the piecing diagram we'll provide for you, at the enlarged size, and find the sections and number them for yourself - in this way, you'll learn a lot about how it is done so you will be prepared if you wish to make your own designs.
Trial layout
 This is one of the trial layouts - I included an old leaf - the dark one - and some new leaves. The blocks are all the same height, but different widths. This didn't give me quite enough variety, so I kept working on it. I have a design wall - it is a panel covered in flannel to which I can pin prints or fabric.
I left it up there and looked at it from time to time while being busy with other things. Then I'd find some more images, crop, size and print them and shuffle them around some more.
Eventually I settled on 3 rows. Along the way, I used the option to "flip" or create a mirror image in order to have a flower facing left rather than right if that seemed to balance the overall design better.
Saturday, August 15, 2009
Sizing the blocks
 First I cropped a series of images and then resized them to be approximately 8 inches tall. Of course this makes the flower many times larger than in real life, but they need to be bigger to be piecable.
I got to the decision on 8" by doing a few trials, seeing what size some of the individual pieces would need to be and if that looked achievable without a lot of grief. And I also played around with some rough layouts to see if that size would let me showcase a variety of flowers without making an enormous quilt.
Note that this flower is very different from the others, pale pink, lots of veins, drooping and with no dark pink sepals.
Another hellebore
 Here's a close up of one of the upward-facing flowers - and also a tight bud which is quite different in color.
I took a lot of digital images and then used Corel's Paint Shop Pro to select some details and re-size them.
Because I liked a lot of different varieties of hellebore, instead of using a single plant on which to base the design, I decided to build the quilt from a series of blocks, each featuring a flower or a leaf.
All the photographs are mine. It is important not to breach copyright by basing a design on someone else's image, unles you have the owner's permission.
Quilts Inspired by Nature - the design process

I'm going to use the Hellebore quilt to illustrate the process I go through. I have a mostly part-shade garden in which these plants - commonly called lenten Rose - seem to be happy. I've added several varieties including some of the newer ones that hold their flowers erect - most varieties have flowers that hang down. Flower colors can vary a lot - cream, light green, pale or deep pink - and leaves change spring green to dark green as the age.
Here's one photographed in April.
Subscribe to:
Posts (Atom)